30 September 2010

Old-Fashioned Apple Cider


Several days ago while out for my early morning walk
I encountered Neighbor and Mrs. M
(who were also out exercising.)

Neighbor M has a small home apple orchard 
with which he kindly blesses the neighborhood 
and his ever-widening circle of friends.

On this crisp and beautiful morning
he inquired if our family would be interested 
in picking some apples to put up for our winter larder.

Now who could turn down an offer like that?!

I assured him we would love to come a bit later in the day
and pick some apples, 
and then I boldly asked if he had his antique cider press ready for action yet,
as I wanted the Treasure to experience that process
one more time before we leave the neighborhood for good.
He assured me that it was up and ready
and to come on over and we would make some apple cider. 
Mid morning we headed that way.


So here's how we made apple cider on that beautiful day in September.


First, you get the tools out,
then you shake the trees
and pick up the apples.


Note the tools used for gathering the apples.
They are actually marketed for gathering nuts,
but they work dandily for apples, too!
You just roll the wire cage over the fruit
and the apples pop themselves into the contraption.
Then you take the gathered goods to the collection container,
open the flexible wires and let them drop out.
Easy-Peasy.
And it saves a lot of backaches!


This is the tool that Neighbor M uses to shake the trees.
It is also used for pruning...but at present I can't tell you which hook is which,
as I'm not that familiar with the tool.
It is very handy, definately a must have for orcharding.


After gathering the apples
(we had about 5 crates)
you plunk them in big containers of water
and splash them up and down to clean them well.

Next you sit in a friendly group around the buckets of wet apples
with knives and while you visit you cut out the worm holes and bad spots,
putting the yucky stuff in a separate bucket,
and the good apples and parts in another big container of water
and they are splashed and rinsed well again,
then placed in a crate by the apple cider press.
Many hands make light work!


Here the apples are,
spiffy clean and pared and waiting for the big squeeze.


When we first moved to the 'hood around 20 years ago,
Neighbor M had a hand crank on this press
and we all took turns making it go 'round.
A year or two ago, the internal mechanisms of the press were getting loose
and so Neighbor M had some repairs made to it
and now it is tight and difficult to turn,
so he attached a motor.

Efficient, but I miss the nostalgia of the hand crank.


The apples are placed in the hopper on top,
and there is a chopping mechanism
then two geared wheels that grind and crush the flesh.
The pulp drops into the slatted barrel beneath.


Here the hopper has been removed
and you can see the geared wheels that
grind/crush the fruit as they turn inward toward each other. 


When the slatted barrel is crammed full of juicy apple bits,
it is slid forward on the stainless tray
until it is beneath the pressing mechanism.
A wooden lid is placed on top
then a wheel is turned by hand to lower the iron screw
so it forces the wooden lid down on top of the apple pulp.


The mechanical pressing force
causes the juice to run out of the apple pulp,
through the slats of the barrel,
down the stainless tray
and into the waiting bowl below.

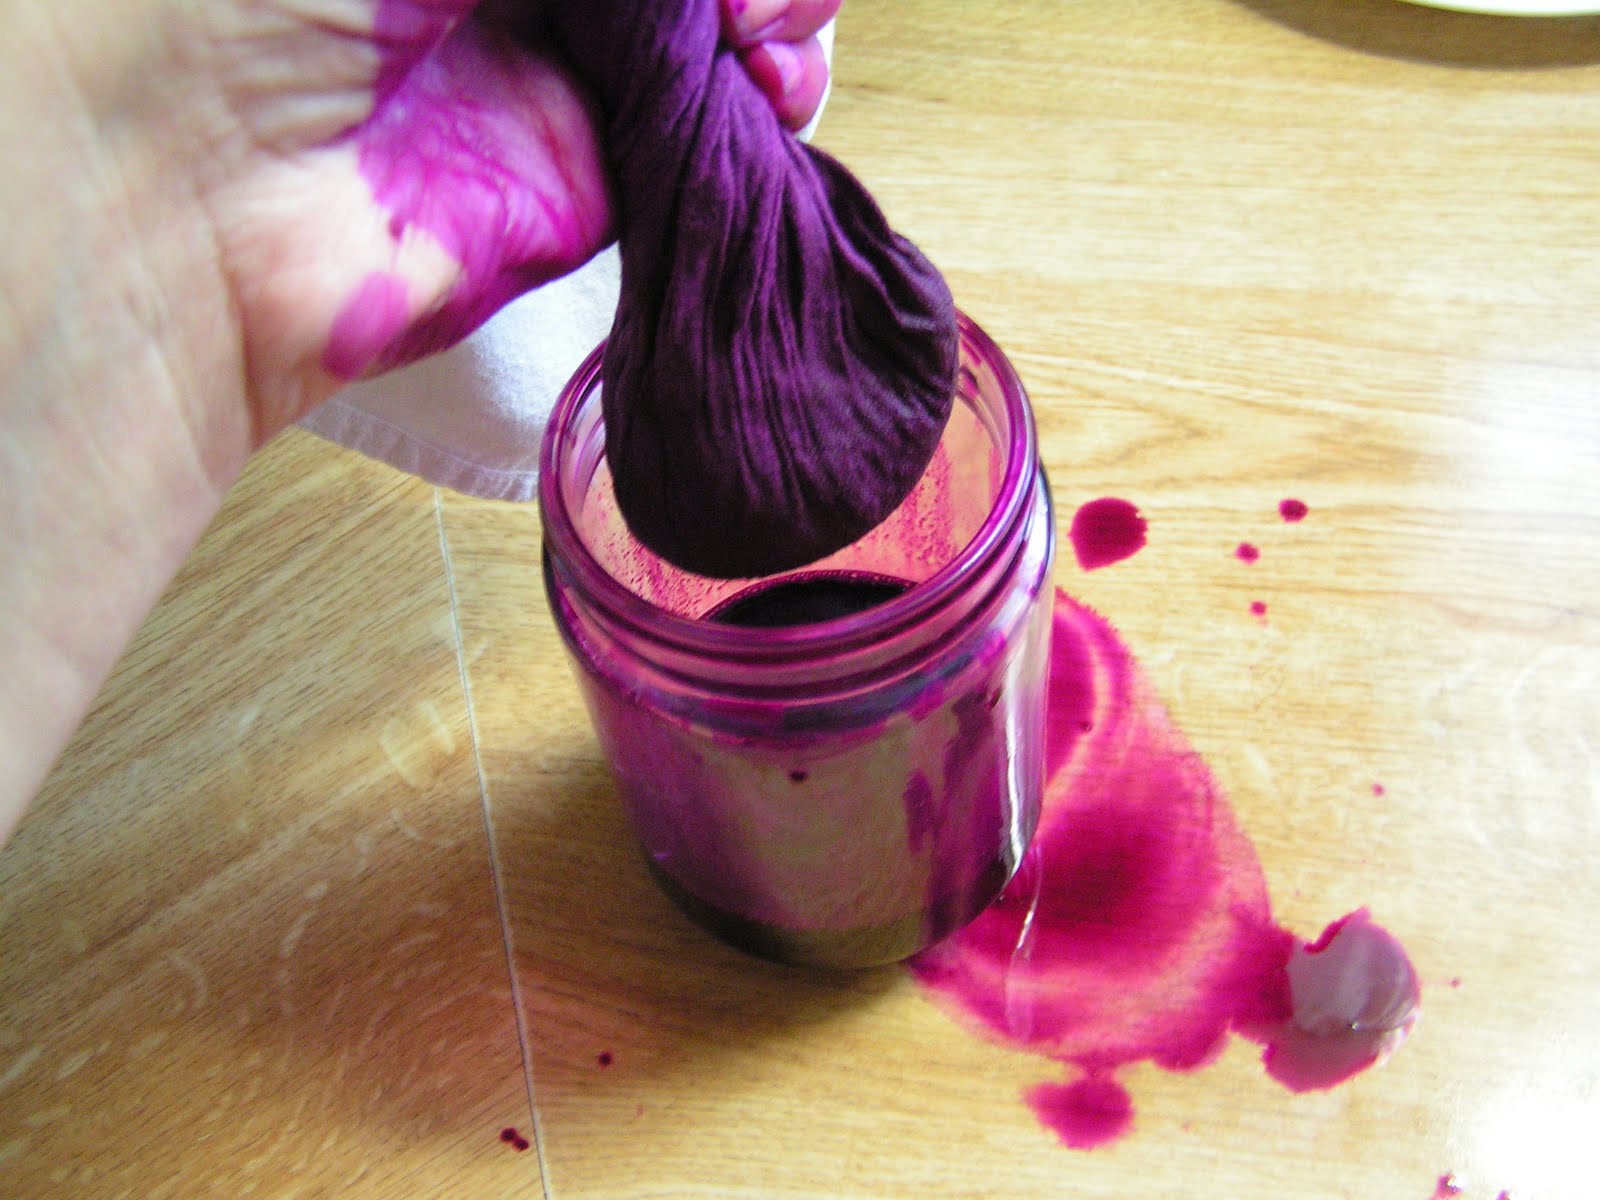
The cotton fabric lining the bowl is used as a strainer,
as invariably there is some debris that flows in with the juice.

There are many insects that come to investigate the process,
and some of them are so greedy
they drown themselves in the golden goodness!
Since most of them come with stingers on one end,
having a cloth for a filter is a good thing.


Finally, the juice is carefully poured into clean containers.
The black wooden contraption at the top of the photo
is one of two jigs that Neighbor M created
to help hold the variety of plastic bottles used to store the juice
so they don't get knocked over while being filled.


Here's the apple pulp that is left after pressing.
It makes great compost, or,
great food for wildlife or livestock.
Neighbor M has a friend that likes to feed it to his cows.
They think it is candy!


And there you have it,
freshly made old-fashioned apple cider.

This pressing yielded 4-5 gallons of cider out of about 5 crates of apples.

We are bountifully blessed...
...we had the fun of making it... 
...the joy of fellowship and a sense of community,
and we will enjoy its goodness for weeks to come.
And we will cherish the memories for many years.


A delicious way to satisfy our thirst!

Many thanks to Neighbor and Mrs. M.
XOXOXOX!!!

29 September 2010

Making Charcoal


We had a leak in the roof of the 5th wheel during a summer rainshower
that we didn't discover until about a week later...
the musty smell was overpowering.

The-Man-of-the-Place went to work making charcoal.
He dug two pits in the garden area
and split up some oak blocks we had on hand
(picked up for free from a place in town that makes rail road ties)

He started a fire and placed them on top
until they were burning well.


He then covered up the burning blocks with barrel halves
that he cut just for this purpose,
and piled the dirt around them to make an air-tight seal.

He walked away and forgot about the project
until the next day when he removed the barrel halves
and picked up the charcoal blocks that were produced.


These were placed in broiler pan trays and misted down with water
and placed around the 5th wheel to help pull out the musty odor.

Charcoal is a great deodorizor and has many applications.
Caution should be taken because it does stain if it comes in contact
with a surface that you don't want to turn black or gray.

Charcoal also is a wonderful adsorber that is used for
many medicinal purposes.
But that will be another post...

It took a few weeks, with some replacement of the charcoal blocks
but the musty odor is now gone and the 5th wheel liveable again.

And, the-Man now has a stash of charcoal blocks
to use for his autumn dutch-oven-cooking passion!

27 September 2010

Persimmon Leaf Lattea


The-Man-of-the-Place has been spoiling me in the mornings recently.
He makes this soymilk-splashed-tea that we both love
with a bit of stevia for sweetening...
...sooo yum especially now that the mornings have a chill to them.


A neighborhood persimmon tree.
I learned about foraging this tea several years ago
while reading Stalking the Wild Asparagus by Euell Gibbon:
A recent discovery points to a use of the persimmon which is not concerned with the fruit. It has been reported in the scientific journals that "persimmon leaves have been found to give exceptionally high values in content of vitamin C." Persimmon Tea could help fortify your family with this protective vitamin, substituting at least in part for the expensive citrus fruits. This tea proves to have a very pleasant flavor, which is surprising in something so healthful. Tea made from the green leaves is very acceptable but that from the dried leaves is even better, having a flavor slightly reminiscent of sassafras.

(We do not find the tea made from the persimmon trees in our area to taste at all like sassafras. This, too, might vary from one locale to another.)

Persimmon tree leaves with green fruit
which ripens in late autumn to a peachy-orange color.
Gather the leaves in summer when they are full grown and spread them on newspapers in a warm attic room until they seem thoroughly dry. Pack them in fruit jars and heat the jar in a very low oven for 30 minutes. This preheating protects them from mold and if two piece dome lids are placed on the jars while they are still hot, cooling will cause them to vacuum seal and they will keep perfectly fresh through the year.

From chapter entitled "The Sugar-Plum Tree," page 169


The first time I dried these leaves I plucked them each off the branch
and put them in a thrifted food dehydrator.
It took less than an hour to dry them to a crisp.

The next batch, the-Man just broke off small branches with leaves intact
and placed them on a screen in our lean-to
to dry in the summer heat out of bright sunlight.
He left them about a week,
then brought them in and just crumbled the leaves into the storage jar.
Much simpler, much less work!

I do believe that I will try the oven canning method
Mr. Gibbons describes above when we move and are settled,
as we will not be living in such a temperature controlled environment
and the humidity could very well cause mold to form
which would make us very sad!


A couple of gallons of the crumbled dried leaves will get us through a winter.
Due to moving, we only have about a half gallon dried for the upcoming season...
so it is a weekend treat instead of an everyday one!

Unfortunately, there are no persimmon trees in the locale to which we are moving.
I believe that we will be planting some--
we love this beverage that much!


It makes a delicious plain tea, which is how we first tried it.
Adding the soymilk has been a recent experiment,
and I'm hooked.

I realize it's not coffee...
but it is better for me...

I'm very satisfied with my new "lattea."

25 September 2010

Storing September


Storing September
You ask me what I did today.
I could pretend and say,
"I don't remember."
But, no, I'll tell you what I did today --
I stored September.
Sat in the sun and let the sun sink in,
Let all the warmth of it caress my skin.
When winter comes,
my skin will still remember
The day I stored September.
And then my eyes --
I filled them with the deepest, bluest skies
And all the traceries of wasps and butterflies.
When winter comes,
my eyes will still remember
The day they stored September.
And there was cricket song to fill my ears!
And the taste of grapes
And the deep purple of them!
And asters, like small clumps of sky...
You know how much I love them.
That's what I did today
And I know why.
Just simply for the love of it,
I stored September.

Elizabeth Rooney


What are YOU doing this September weekend?


Go on.....store some September for yourself!

And have a blessed weekend!


23 September 2010

Polka-berry Ink

Ripe berries of the common polk/ poke plant.

Our Treasure has been after me for a week or so...
"Momma, when are we going to make polka-berry ink?"

Friday just past was a gorgeous crisp autumnish day,
and the time was right... so out we went with our bowls.

This is a young poke plant, the top 4-5 leaves could be plucked
off and boiled twice for a delicious pot-herb.

I couldn't help spending a little time with the camera
capturing the beauty of the plants from which we were harvesting berries.
It was interesting to note the new plants as above,
and the mature plants with their variety of colors.


Amazing color variation in the dying leaves...
sorry it is a little blurry, the wind was blowing!


The stems of the berry clusters were absolutely gorgeous,
and I love the delicate flower-like remains
when the berries were removed.


Even the contrast of the very un-ripened green berries
with the magenta stems was sensual.


But back to the berry-picking.

From the time our Treasure was a tiny baby in a sling
we have taken her on our outdoor hikes and foraging treks.
We have taught her from day one
what plants and which parts are useful, and their applications.
We have also cautioned her
 (ok, at times it sounded more like threats!)
that she MUST always ask our permission
before putting anything in her mouth
as some plants and berries that are poisonous
look very much like ones that are not,
and we did not want her to become sick or die.
Thankfully, she has listened and believed us
and is very good about obeying this mandate.

It is a joy to see her develop as a young herbalist...
to have an appreciation and respect for the
useful plant world we habitate...
yet to also develop the wisdom to leave alone
the things she has insufficient knowledge of.

Poke, or polk, as some spell it,
is a plant useful as an edible pot herb, medicinally,
and for making natural dye.
Birds love the berries too, and therefore
propogate the species far and wide.

The berries are said to be toxic,
although they are reported to be used medicinally as well.
Why someone would even want to eat the berries
is beyond me, I couldn't get them beyond my nose!
When crushed they just smell bitter! Yucky!
Someday I hope to study up more on the medicinal uses,
but until I do, and cautiously experiment,
I won't recommend the plant for that.

I do have some experience with eating
young poke greens in the spring,
they are very tasty and none of our family had negative effects.
It is best to avoid using parts of the plant with red color in it,
as that is evidence of a chemical rising in the plant
that can have negative effects on the human system.
(Like I said, I don't have enough study or experience
to tell you all the chemical names or details yet!)
I've used poke berries in the past for making dye
and had gorgeous results, though the color is
reported to fade quickly with exposure to light.
But those will be other posts at other times.

Back to our polka-berry ink making experiment!


We exhausted the plants in our yard of their berries,
and had the stains to show for it.
Soap and water took most of it off,
and it was all gone by evening.


I had done some internet research on making polka-berry ink,
and decided to follow directions at this link:
So we carefully measured out 8 ounces of poke berries...

...placed them in a clean water bottle along with 2 1/2 teaspoons of yeast,
shook it all up with the cap on, removed the cap and replaced it
with some paper towelling secured with a rubber band,
and placed it in a dark cupboard to do its fermenting
for the next 24 hours.


We actually let the fermenting ink sit for about 48 hours
and then placed a square of an old cotton dishtowel into a clean jar
and dumped the mass of pulp into it and squeezed it out.
I won't be filtering it any further, as the above directions direct,
as I don't plan to put it in a fountain pen,
but rather use it for dip-pens.


The Treasure couldn't wait--she grabbed a chicken feather
and started dipping and scratching--
absolutely thrilled that it works!!
I did a little carving on the "quill pen" and the result
is what you see above.
I need to do more research and experimenting with the pen,
but for now she's happy as can be.

There you have it,
Polka-berry Ink!

(p.s. The Treasure has called them "polka-berries"
since she could talk about them...I should correct her,
but just hearing her say that gives me a vision
 of a merry party of wee-woodsy-folks
in passionate-poke-berry-purple-and-contrasting-green attire
dancing happily to polka music...)


21 September 2010

Onion--My Friend!!


Any kind of onion will work!

I recently had the misfortune of making a very ungraceful spectacle
of myself in the middle of a pizza parlor...
(fortunately in a town in another state...)

We had ordered and paid for our veggie pizza
and I had filled three large glasses with ice and water
and was walking over the the sectioned-off area
where the Treasure had chosen our booth...
I had three glasses of ice water in my hands
and was looking at her
instead
of where my feet were going....
I vaguely remember there was a difference in the floor color
but I completely missed the fact that there were two steps up...

Now, you can usually recover if you miss one step,
but two?
The harder I tried to recover, the faster I went...
I couldn't even control the direction I was heading!
I must have landed on my knees first,
(due to having my hands full)
and then hit the edge of a table with my right shoulder
which flipped me over
and when I took my next (painful) breath
I was on my back side looking up
with pain shooting all over my body and
wondering what had just happened!

A couple of strangers came running...
and when I could talk again, well,
...I just started giggling!

What else is a girl to do in such a situation?


10 days after the incident...lots of healing has already happened.


I was finally able to get some ice packs for my aching knees,
and got through a few bites of supper.
We still had a horse-trailer and truck load of stuff to move into a storage unit,
but we found a store with some first aid supplies
and did the initial clean up of the rug-burn to the knee on the left.

By this time I was making a lot of old-lady noises
as moving hurt a lot!
But we had work to do, and the Man was dog-tired
and I decided to cowboy up and help him get it done.
The abrasion on the left was painful,
but the swelling and aching in the joint on the right was the worst.

Later that evening we made it to Poppa J's
and before heading to bed I decided to try a home remedy
that I had heard--and then read about--
so I sliced up an onion,
slapped the raw slices all over the right knee
and taped it all in place.
Amazingly, two hours later when I got up
to answer Mother Nature's call
the right knee swelling was all gone
and I could bear weight on it with no pain,
even going up and down stairs!
I still had bruising, and kneeling wasn't comfortable,
but it was an amazing and speedy recovery!

I couldn't bring myself to put the onion slices
over the abrasions on the left knee,
and it took three weeks for the pain and swelling
to subside in it.
(And for the road-rash to heal!)

A quote from the herbal (now out of print, but still available for a price!)
"10 Essential Herbs" by Lalitha Thomas:

In addition to the active ingredients in Onion that help it to break up fluid congestion in body tissues, such as in bruising and swelling, there is also an action that is anti-inflammatory. I have often used an Onion/Salt poultice for the infamous "water-on-the-knee" injury common to many knee twisting sports. In every case so far this self-help approach has been successful--breaking up and drawing out blood and lymph fluids with little or no inflammation to the tissues. The result has been quicker recovery . The same treatment works wonders on sprained ankles and bruised ribs. pg.227
and
Onion breaks up the congestion of many types of fluids under the skin, including blood which causes bruising, and congested lymph which causes additional swelling and pain. Use Onion as a poultice, finely chopped, blended, or sliced into a convenient form and applied directly to a fresh bruise or to an old one, or use it as a preventive measure on an area that might develop a bruise. If extra fluid-drawing power is needed, mix 1/3 to 1 equal part of table salt into the poultice. For ordinary bruises, Onion usually does the job all by itself.
Think of a slice of Onion as a quick tape-on-remedy for most small to medium size bumps and bruises. Use a full-fledged Onion poultice for larger areas of bruising...
Comfrey is a great addition to Onion in any "bruise situation." pg. 231
and
ONION/SALT POULTICE: Onion breaks up congestion and/or toxins under the skin that cause bruising, swelling, inflammation, and pain. It then helps to move the toxins out through the blood, lymph and skin. Salt adds drawing power to the Onion poultice. With this combination I have often had dramatic, overnight results in a large variety of situations, such as water-on-the-knee, twisted or jammed joints and appendages, renewed swelling of old injuiries or of surgeries done to repair those injuries, lung congestion, other organ congestion, "bumps-on-the-head" that result in large knots and /or bruises...just about any situation where you need the kinds of action Onion provides. In some situations it may be more convenient to use a plain Onion poultice without the salt mixed into it. This can work very well. The salt is mainly for extra drawing power of unwanted fluids.
Here is how to make this  poultice. Grind, or finely chop, enough Onion to cover the area to be helped. To this "Onion mush," add salt in the proportions of 2:1, that is for 1 cup of chopped onion you would add about 1/2 cup of salt. Sea salt is preferable and in any case it is best to use salt that is not iodized when possible. Pile this mixture on and/or around the joint, bruise, bump, imflammation, sprian, swelling, etc. Place it either directly onto the skin, or wrap the mixture in a thin, natural fiber cloth, if this is more convenient. If put directly onto the skin first, hold the mixture onto the area with a thin, natural fiber cloth and fasten the cloth in place with an elastic bandage or with surgical tape. Since the poultice is wet, and since you will want to keep it that way, wrap the entire area with a plastic bag or plastic wrap. Seal the edges as best you can with maksing tape or whatever you have. If you keep the skin around the poultice dry, it works well to tape the plastic wrap to the skin which usually forms an adequate seal. At least it minimizes leakage.
The best time to apply an Onion/Salt Poultice is at night so you can sleep with it on and remove it in the morning. I don't find it worth all the preparation unless it is done at a time when it can be left on for at least two hours. In removing it you may find that the Onions will have a strange odor. This is from the fluids pulled out of the area by the poultice. Have a plastic bag handy to throw the whole thing into for convenient disposal. Some People find the Onion aroma lingers on the skin. If this is unwanted, it is easily removed by washing the skin and then rubbing the affected area with lemon juice.
A one-night poultice is usually enough to clear up most conditions. For stubborn situations, such as a lont-term lung congestion or an old injury, you may repeat the poultice as needed.
There are circumstances where a heated poultice is useful, such as for lung congestion. For these times it is a simple matter to put the poultice, cloth and all, into the oven on a baking dish until it is warmed enough. It can be kept warm with a hot water bottle.
Remember, this poultice, without the salt, still works very well. The salt is there for its potent drawing popwer which is necessary when there is more that a little swelling involved...
Comfrey is an additional supplement to use with and Onion poultice...pgs. 239-40.

I do enjoy experimenting with herbal remedies,
but I don't go looking for this kind of trouble to try them on!
I am glad I remembered to try Onion in this situation,
and I will definately use it again should the need arise.
Onions are found everywhere in the world
and have many more medicinal uses than described above.

I find it very satisfying to be able to meet out first-aid needs
with natural and inexpensive medicines.

19 September 2010

A Princess Painting


I can't help myself...I love my daughter's art.

It reflects her personality so very well.
Happy colors. Lots of movement. Dramatic.

I'm so grateful to be able to educate at home.
I attended public school during my elementary years...
my day started in the early dark, pulling on cold clothes
and doing morning chores and eating a hurried but nutritious breakfast
in order to catch the bus upon which I rode for an hour before reaching school...
and an hour after school let out...
then it was time to do evening chores, eat supper, and do whatever
our family did in the bit of evening left.

The Treasure gets to sleep until she's ready to wake up (usually)
and then she gets to snuggle in a warm lap or bed for a bit,
and maybe gets read to, then she is up and at her morning chores,
part of which is doing some "listening" to CD's,
and during this time she usually pulls out her art materials
and creates something her momma thinks is magnificient...
I am sooo glad my girl has time to develop
creatively, physically, mentally, spiritually and socially
rather than wasting much of her day standing in lines
or waiting with raised hand to be called upon...
or told repeatedly to sit down and be quiet...
or gossiping foolishly with other little peers.

Wish I'd been home-educated!

Wait. I guess I AM being home educated...now!!!
I absolutely love learning alongside her.
But I digress.

Here is my favorite painting from the past week.
And I love that she spelled P-R-I-N-C-E-S-S
all by herself!

Hope it makes you smile today too!
:o)

18 September 2010

Butterfly Bait


I'm a sucker for getting a great nature shot,
even if it requires standing beside a smelly compost pile
in 98 degree full sun for an hour
while being constantly buzzed by all sorts of six-legged creatures.


This little guy flirted with me mercy-less-ly for such a long time...
he would flick open his gorgeous wings and then slap them shut
before I could even depress the shutter button...
I'm just grateful I have a digital camera now
or I would be out several dollars in rolls of 35mm film!


This beauty was much more cooperative...


as was this one.....


and though these aren't really pretty...


...they ARE interesting!

Hope you have a restful and blessed weekend.


17 September 2010

Vegan Veggie Fajitas


I am sooo blessed to have a Man who loves to cook!

We recently ate at a Mexican restaurant and loved the veggie fajitas they served.
The-Man-of-the-Place decided he could learn to make them at home,
and I'll be switched if he hasn't done a great job of replicating them.

First boil some potatoes until they are almost done,
cool them and dice or slice them up.
Chop up whatever other veggies you like and have them ready
before you begin cooking the whole dish--it's kind of like making stir-fry.
As I recall, the restaurant had potatoes, carrots (julienned), onions,
green and red peppers, broccoli, and mushrooms.
You get the idea--just put in whatever you like.
I think the potatoes are the most important though.

We melt a little coconut oil in the pan--
it tolerates the heat better than other vegetable oils.
Throw in the potatoes and cook them,
then add the other veggies and stir-fry them too.

The-Man's secret to getting that smoky-grill flavor
without using animal fat is to put
1 Tablespoon liquid smoke in
1/4 cup water, stir well, and
sprinkle over the whole mixture while keeping it moving in the pan.
We also season it with some Herbalmare (herb infused sea salt)
You can add other seasonings as you like,
some garlic powder and onion powder would be great!


Here's more of our current outdoor kitchen--
the Man loves his cooking gear!
(I'm grateful any time he cooks!)


When everything is seasoned to your taste
and cooked well but the veggies are still a little crisp...


...throw it in a whole wheat tortilla,
top with whatever you like...
salsa, soy sour cream, lettuce, soy cheese...
wrap it all up and have a feast!